X4 GPIO05 《-》 X34 SW5
X4 GPIO06 《-》 X34 LED1
c)。 源代码请参考如下,分别实现了阻塞模式和非阻塞模式中断相应,实现功能就是按键交替点亮和关闭LED灯。
。/ 阻塞模式 – https://github.com/simonqin09/libsoc-examples/blob/master/python/gpiotest_block.py
// main 函数作为主函数,实现打开GPIOs,同时设定初始化状态为高电平输出;test_interrupt_handler函数实现中断相应,采用 gpio_in.wait_for_interrupt 为阻塞式中断,捕获中断才会继续进行,捕获中断后做了简单的防误触处理。
。/ 非阻塞模式 – https://github.com/simonqin09/libsoc-examples/blob/master/python/gpiotest_nonblock.py
// main 函数作为主函数,实现打开GPIOs,同时设定初始化状态为高电平输出;另外,在main函数里面采用gpio_in.start_interrupt_handler来使能中断相应,为非阻塞式;在main函数最后通过while来接收键盘输入实现退出应用;gpio_in.wait_for_interrupt依然作为中断处理函数相应中断并驱动LED状态改变。
d)。 将Python代码直接复制到Apalis iMX6上面测试运行结果如下:
。/ 阻塞模式下,最后是通过Ctrl-C强制退出程序
-----------------------
root@apalis-imx6:~# 。/gpiotest_block.py
The LED initial status is ON
The LED turns OFF
interrupt times is 1
The LED turns ON
interrupt times is 2
^Clibsoc-gpio-debug: Interrupted system call
Traceback (most recent call last):
File “。/gpiotest_block.py”, line 54, in
main(gpio_input_id, gpio_output_id)
File “。/gpiotest_block.py”, line 45, in main
test_interrupt_handler(gpio_in, gpio_out)
File “。/gpiotest_block.py”, line 12, in test_interrupt_handler
gpio_in.wait_for_interrupt(-1)
File “/usr/lib/python3.5/site-packages/libsoc/gpio.py”, line 118, in wait_for_interrupt
if api.libsoc_gpio_wait_interrupt(self._gpio, timeout) != 0:
KeyboardInterrupt
-----------------------
。/ 非阻塞模式下
-----------------------
root@apalis-imx6:~# 。/gpiotest_nonblock.py
The LED initial status is ON
please enter ‘Q’ to quit
The LED turns OFF
The LED turns ON
The LED turns OFF
Q
Do you really want to quit? yes or no
yes
root@apalis-imx6:~#
-----------------------
4)。 使用PyQt5实现图形化界面GPIO中断程序
a)。 硬件配置和连接和上面的测试场景一致。
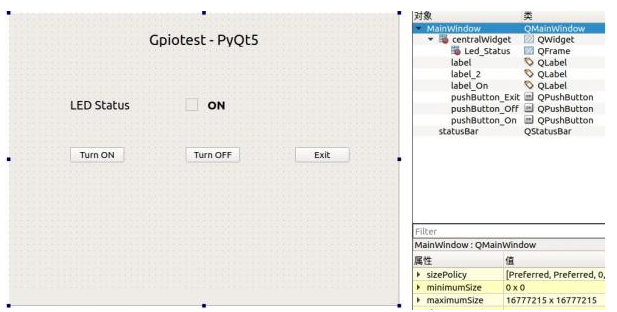
b)。 为了方便开发PyQt5界面,首先通过Qtcreator创建如下QWidget项目UI界面
